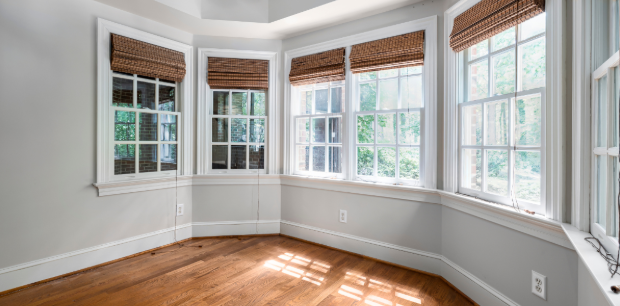
Wondering how to install replacement windows?
If your current ones are drafty, stuck, or just plain outdated, a window replacement can make your home more comfortable, energy efficient, and easier on the eyes.
With the right prep and tools, you’ve got this. You’ll remove the old window, prep the opening, install the new one, then seal and trim.
This guide walks you through each step, helps you avoid common mistakes, and keeps things simple—no frantic Googling required. Let’s get started.
Key Takeaways
- Careful prep and clean cuts make installing replacement windows way easier.
- Follow the process, check your fit, and don’t skip the flashing.
- For a pro-level job without the hassle, Wallaby’s got your back.
Know Your Window Replacement Options
Before you start ripping out sashes, it’s good to understand the two main paths you can take:
Insert windows
Also called pocket replacements, these fit snugly into the existing window frame. You keep the interior trim, siding, and frame intact. This method is faster and easier—perfect if your existing frame is in good condition.
Full-frame window replacement
This is the total replacement route. It involves removing the old window, frame, stops, and sometimes even siding. You’re installing a new window frame directly into the window opening.
This is ideal when the frame is damaged, out of square, or you’re just ready for a total refresh.
Not sure which route to take? Give your existing window a good inspection. If it’s solid and square, go insert. If not, consider a full-frame replacement.
Tools and Materials You’ll Need
Before you start the installation process, gather your gear. You’ll save time and avoid having to dash to the hardware store mid-project.
Tools
- Tape measure
- Utility knife
- Putty knife
- Pry bar
- Drill/driver
- Level
- Hammer
- Caulk gun
- Safety gear (gloves, goggles, dust mask—especially for lead paint)
Materials
- Replacement windows
- Flashing tape
- Caulk (paintable latex or silicone)
- Spray foam insulation (low-expanding)
- Wood putty
- Shims
- Screws
- Backer rod (for big gaps)
- House wrap (if exposed)
- Drop cloths to protect your furniture
Step 1: Measure for Your New Window
Before you order anything, measure your window opening like a pro.
- Measure height in three spots: left, middle, right.
- Measure width: top, middle, and bottom.
- Use the smallest numbers.
- Measure diagonally to check that the opening is square.
- If you see a big difference between diagonals, your opening may need adjusting before you install.
Tip: Your new window should be about ¼ inch smaller than the rough opening to allow for shims and adjustments.
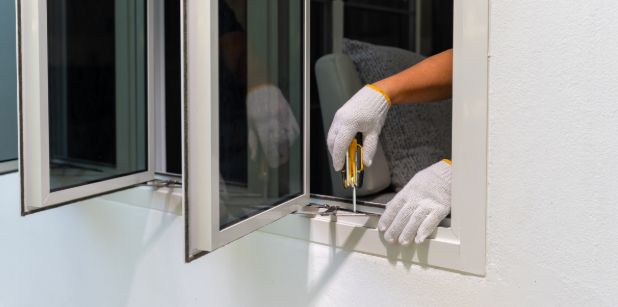
Step 2: Remove the Old Window (Carefully)
Start by removing storm windows, if you have them. Some slide right out. Others are screwed in.
Then, carefully remove the interior stops, parting stops, and sashes. Depending on the age of your window, you might uncover:
- Sash weights (cut cords and let them drop)
- Spring-loaded sashes (be ready—they can snap!)
- Decades-old caulk and paint (use your utility knife to score edges)
Use your putty knife and pry bar to carefully remove any remaining trim, being gentle if you plan to reuse it.
Watch for lead paint in homes built before 1978. Use a dust mask and follow EPA-safe procedures.
Step 3: Prep the Opening
Now that the old window is gone, give the opening a deep clean. Grab your shop vac and get rid of dust, debris, old caulk, and loose insulation.
Check the wood around the frame. If anything feels soft or crumbles, use wood putty or replace that section entirely. You want a solid, level base for the new unit.
Apply flashing tape
- Lay flashing tape across the sill, wrapping it a few inches up the sides.
- Add tape to the sides of the opening next.
- Leave the top for last (we’ll come back to it after the window is in).
This creates a watertight, shingle-style seal that helps protect the opening from water damage.
Step 4: Dry Fit the Window
Before you commit to caulk, dry fit the window to make sure it fits into the existing frame (for inserts) or the rough opening (for full frame).
- Place shims if needed to level and plumb the window frame.
- Check that the sash opens and closes smoothly.
- Adjust until the frame is square.
If everything looks good, remove the window and get ready for final placement.
Step 5: Apply Caulk and Set the Window
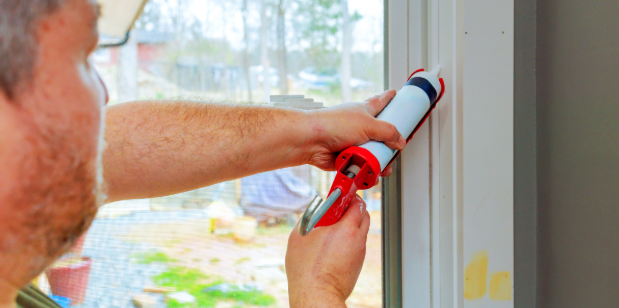
Run a continuous bead of caulk on the back of the window frame or around the opening, depending on your window style. Then:
- Slide the new window into place.
- Press firmly into the caulk bead.
- Shim the sides and bottom again if needed.
- Check for plumb, level, and square.
- Secure the window with screws through the pre-drilled holes in the frame.
Don’t overtighten. You don’t want to warp the frame!
Step 6: Insulate and Seal
Now we’re sealing things up for max comfort and efficiency.
- Spray foam: Fill gaps between the frame and opening with low-expanding spray foam.
- For bigger gaps, add backer rod before foaming.
- Let it cure fully.
- Trim off excess foam with your utility knife.
Next, install interior trim and seal all edges with caulk. Smooth it out with a wet finger or tool for a clean finish.
Step 7: Final Touches and Clean Up
Almost there!
- Apply flashing tape across the top of the window.
- Reinstall or replace exterior trim if needed.
- Use caulk to seal edges.
- Fill nail holes with wood putty.
- Touch up with paint to match the interior or exterior.
Now take a step back, open and close your window, and bask in the glow of a job well done.
Common Window Replacement Mistakes to Avoid
Even savvy homeowners can trip up. Here are some quick don’ts:
- Don’t skip flashing—it’s your water barrier.
- Don’t overtighten screws—this can warp the frame.
- Don’t foam too much—low-expanding only!
- Don’t install over rotting wood—it’ll come back to haunt you.
When to Choose Full Frame Replacements
Full frame window replacement is your best bet when:
- The existing window frame is rotted or severely out of square.
- You want a style or size upgrade.
- You’re replacing double-hung windows with a totally new design.
It’s more labor-intensive but gives you a completely fresh start—and better long-term performance.
Ready to Ditch Drafty Windows? Call Wallaby Windows
If your windows are leaking air, tough to open, or the project just isn’t going as planned, we’ve got your back. Wallaby Windows takes the hassle out of home upgrades with expert service from start to finish.
Our White Glove installation covers everything from precise measuring to debris cleanup. We don’t stop at windows, either. We also offer door installation, including sliding glass doors, French doors, and entryways—so your whole exterior gets a polished, high-performance finish.
Skip the stress and get it done right. Schedule your free assessment today and let our team handle the heavy lifting.
Conclusion
Now that you know how to install replacement windows, you’re ready to take on your next project with confidence. From removing parting stops to prepping the window opening and securing the new window, you’ve got the process down.
With the right materials, tools, and a bit of patience, replacing windows can be a satisfying job done right. And if you decide you’d rather skip the mess, Wallaby Windows is here to help.
Frequently Asked Questions
Can I install replacement windows myself?
Yes, if you’re handy and follow the installation process step by step.
You’ll need tools, patience, and the right materials. Stick to the manufacturer’s instructions, double-check the fit, and don’t rush the seal around the window. If you’d rather skip the mess, pros like Wallaby can handle it all for you.
Is it better to install replacement windows from the inside or outside?
Usually, it’s easier to install from the inside, especially with insert replacement windows. It protects your siding and house wrap. But full-frame replacements may need exterior access. It depends on your window style and how much you’re replacing.
How do I prepare my house for replacement windows?
Clear the space around your windows, remove blinds, and lay down drop cloths. If doing a full-frame replacement, be ready to work around siding or house wrap. Have all your materials, like caulk, flashing tape, and screws, ready before you start.
How much for 2 replacement windows?
Costs vary, but most homeowners spend $600 to $2,000 for two windows, depending on size, type, and location. Insert windows are cheaper than full-frame windows. Want a precise number? Schedule a free assessment and get an exact quote with no pressure.