Getting new windows installed in Jacksonville, FL is a big deal, especially with all the weather we get around here. After the installers pack up and leave, it’s easy to assume everything’s good to go. But before you settle back in, it’s smart to run through a post-installation inspection checklist for window replacement in Jacksonville, FL. This way, you can catch any issues early and make sure your new windows are up to code, sealed tight, and ready for whatever Florida throws at them. Here’s what you should look for once the job is done.
Key Takeaways
- Always check that your new windows have the right Florida Product Approval or Miami-Dade NOA stickers. These prove they’re legal for use in Jacksonville.
- Test every window to make sure it opens, closes, and locks smoothly. Don’t just assume they work—try them out yourself.
- Look closely for any drafts, gaps, or spots where the sealant looks thin or missing. These little problems can turn into big headaches later.
- Keep all your paperwork, like product specs, permits, and warranty info, in a safe spot. You might need them for insurance or if you sell your house.
- Make sure the crew cleaned up after themselves and didn’t leave any mess or damage behind. Walk around and check both inside and outside.
Confirming Product Compliance and Approvals
Verify Florida product approval or Miami-Dade NOA
When you’re getting new windows in Jacksonville, it’s super important to make sure they’re actually approved for use here. Florida has some pretty strict rules, especially when it comes to hurricanes. You need to check that your windows have either a Florida Product Approval number or a Miami-Dade Notice of Acceptance (NOA). These approvals mean the windows have been tested and meet the state’s standards for wind resistance and impact protection. Without these, your windows might not be legal for installation, and you could run into trouble with permits and inspections. It’s not just about passing a quick check; it’s about having windows that can actually do their job when a storm hits.
Understand design pressure (DP) ratings
Design Pressure, or DP, is basically a number that tells you how much wind and water pressure a window can handle. The higher the DP rating, the stronger the window. For Jacksonville, you’ll want to know what DP rating is required for your specific area. This rating is usually listed on the product approval sticker or documentation. It’s not something you can just guess at; it’s based on engineering tests. Make sure the DP rating on the windows you choose meets or exceeds the requirements for your home’s location. Your contractor should be able to explain this clearly.
Check for wind-borne debris region compliance
Jacksonville is in a region that needs protection from wind-borne debris, which means windows need to be able to withstand impacts from flying objects during a hurricane. This is where those Florida Product Approvals and Miami-Dade NOAs come in handy again. They’ll specify if the window is rated for impact resistance and for which wind-borne debris region. You need to confirm that the windows you’re getting are approved for the specific region you live in. It’s a key part of making sure your home is properly protected against severe weather.
Verifying Installation Quality and Sealing
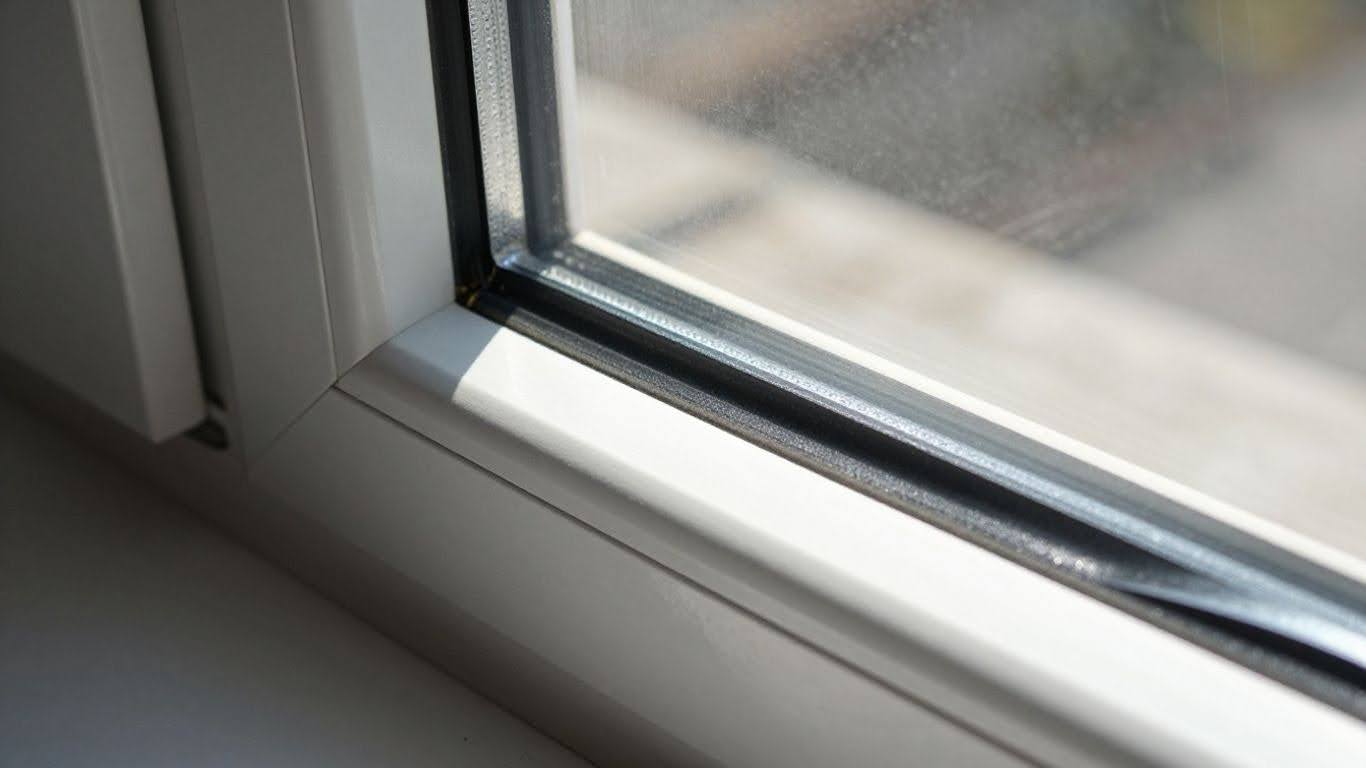
After the new windows are in place, it’s time to really check if they were put in right. This isn’t just about whether they look good; it’s about making sure they’ll keep the weather out and work like they’re supposed to for years to come. A good installation means the window is sealed up tight, operates smoothly, and the frame is properly secured.
Inspect window operation and locking mechanisms
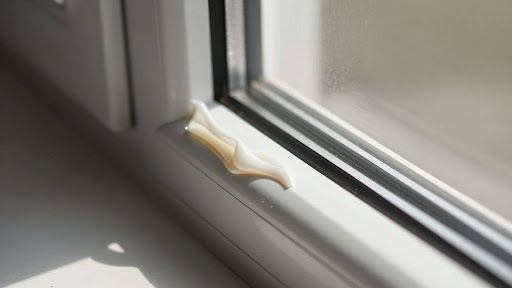
First things first, give each window a good test run. Open and close them a few times. Do they slide easily? Do they feel stiff or catch on anything? They should move without a lot of force. Then, check out the locks. Make sure they engage properly and feel secure. You don’t want to find out a lock is faulty when you actually need it. It’s also a good idea to test any special features, like tilt-in sashes or multi-point locking systems, to confirm they work as designed.
Check frames for drafts and gaps
This is where you really look for quality work. Run your hand around the edges of the window frame, both inside and out, to feel for any drafts. Even a small gap can let in air and moisture, which you definitely don’t want, especially during Jacksonville’s humid summers or cooler winter days. Look closely for any visible cracks or spaces between the window frame and the wall. Sometimes, a flashlight can help spot small openings you might otherwise miss. A well-installed window should feel solid and sealed.
Confirm proper sealing around frames
Sealing is super important for keeping your home energy efficient and protected from water. The installer should have used caulk or a similar sealant around the exterior of the window frame where it meets the siding or brick. Check that this seal is continuous and looks neat. There shouldn’t be any big gaps or areas where the sealant has pulled away. Inside, look at where the drywall meets the window frame. There should be a clean caulk line there too, covering any small gaps left after drywall finishing. This seals up the whole unit, preventing air and water intrusion.
A proper seal isn’t just about aesthetics; it’s a critical barrier against the elements. Think of it as the final handshake between your new window and your home’s structure, protecting against everything from driving rain to sneaky drafts that hike up your energy bills.
Reviewing Project Documentation
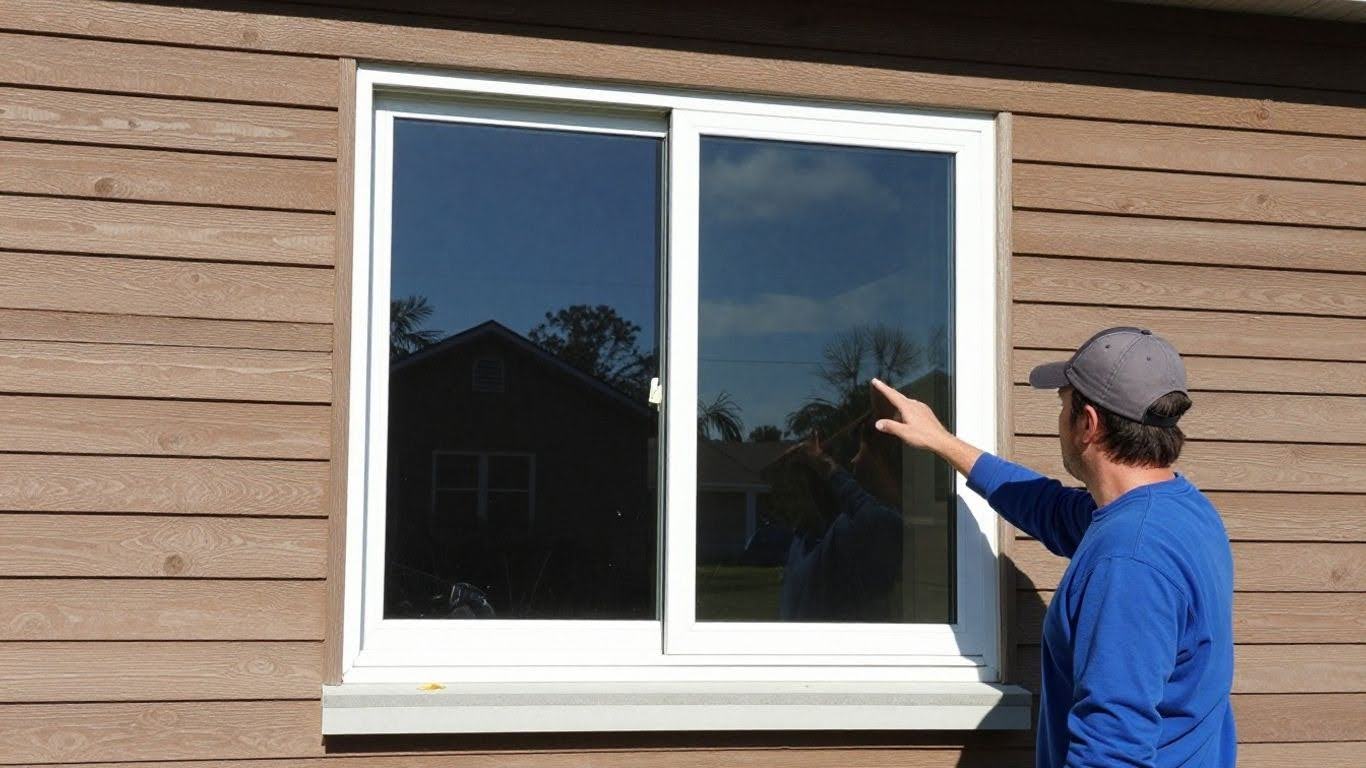
After the new windows are in, it’s a good idea to take a moment and gather all the paperwork related to the job. This isn’t just busywork; it’s about making sure everything was done right and that you have everything you need for the future. Having all your documents in order can save you a lot of headaches down the road.
Gather product specifications and approval numbers
Make sure you have the exact details of the windows that were installed. This includes:
- Manufacturer and Model: Know who made the window and the specific model number.
- Product Approval Numbers: For Florida, this often means the Florida Product Approval (FL #) or Miami-Dade Notice of Acceptance (NOA) number. These confirm the window meets state building codes, especially for wind resistance.
- Design Pressure (DP) Rating: This number tells you how much wind pressure the window is designed to withstand. It’s important for understanding the window’s performance in storms.
- Material and Color: Confirm these match what you ordered.
Obtain contractor license and insurance information
It’s wise to have a record of the contractor’s credentials. This usually includes:
- Contractor’s License Number: Verify it’s current and valid for Jacksonville.
- Proof of Insurance: Specifically, look for general liability and workers’ compensation insurance. This protects you if something goes wrong during or after the installation.
Collect permits and final inspection approvals
Window replacements, especially in areas like Jacksonville that are prone to hurricanes, often require permits. You should have:
- Permit Number: The official permit issued by the city or county building department.
- Final Inspection Sign-off: Proof that a building inspector has reviewed the work and approved it. This is a key step that confirms the installation meets local building codes.
Secure warranty and manufacturer care instructions
Don’t forget about the long-term care and protection of your new windows.
- Manufacturer’s Warranty: Understand what the warranty covers (e.g., frame, glass, seals) and for how long. Keep a copy of the warranty document.
- Contractor’s Workmanship Warranty: Some contractors offer their own warranty on the installation itself.
- Care and Maintenance Guide: Follow the manufacturer’s recommendations for cleaning and maintaining your windows to keep them in good condition and to avoid voiding the warranty.
Keeping these documents together in a safe place, like a home binder or a digital folder, makes it easy to access them when needed. It’s your record of a job well done and a reference for any future questions or issues.
Assessing Local Code Adherence
When you’re getting new windows in Jacksonville, it’s not just about picking a style you like. There are rules, and they’re there to keep your home safe, especially with Florida’s weather. Making sure everything follows the local building codes is a big part of the job.
Confirming adherence to Jacksonville’s specific requirements
Florida has the Florida Building Code (FBC), which is pretty thorough. But sometimes, cities or counties add their own little details or have specific ways they interpret things. For Jacksonville, it’s smart to check if there are any local amendments or special rules that apply to your area. This usually isn’t a huge hurdle, but knowing upfront saves trouble later. Your contractor should be on top of this, but it doesn’t hurt to ask.
Understanding the role of county building departments
The folks at the county building department are key players. They’re the ones who sign off on permits and do the final inspections. They have the most up-to-date info on what’s needed for your specific location, especially concerning things like wind zones and flood areas. They can tell you exactly what window ratings you need to meet the code.
Reviewing permit application and approval details
Your window replacement project needs a permit, and that permit application is a record of what you agreed to have done. After the work is finished, the county will do a final inspection. Getting that final approval means the work met the code requirements. It’s good to have copies of the permit application and the final inspection approval. This paperwork is proof that the job was done right according to the rules.
It’s easy to get lost in the technical details of building codes, but remember, they’re designed to protect your home and family. A good contractor will guide you through this, but being informed yourself is always a good idea. Don’t hesitate to ask questions about why certain requirements are in place.
Here’s a quick rundown of what to look for:
- Permit: Was one pulled for the job?
- Application: Does it list the type of windows and installation methods?
- Inspections: Were all required inspections passed, especially the final one?
- Approval: Do you have documentation showing the project was approved by the building department?
Post-Installation Operational Checks
Alright, so the new windows are in. That’s great! But before the crew packs up and leaves, we need to make sure they actually work like they’re supposed to. It’s not just about them looking pretty; they’ve got to function right, especially here in Florida with our weather.
Test window opening and closing smoothness
First things first, let’s give each window a good workout. Open them up, close them down. They should move smoothly without any sticking or feeling like you’re fighting them. If a window feels stiff or hard to budge, that’s a red flag. It could mean the frame isn’t quite square, or maybe something’s out of alignment. We want them to glide easily, not require a Herculean effort.
Verify locking mechanism functionality
Next up, the locks. Make sure every single lock engages properly and feels secure. You shouldn’t have to jiggle or force the lock to get it to catch. A good lock should click into place with a satisfying thud, letting you know it’s doing its job. Test them a few times to be sure. It’s easy to overlook this, but a window that doesn’t lock well is a security issue, plain and simple.
Assess weatherproofing during inclement weather
This one’s a bit trickier to test right on the spot unless we’re lucky enough to have a sudden downpour. But it’s super important. After the installation, keep an eye out during the next rainstorm. Check around the frames, both inside and out, for any signs of water getting in. A properly installed window should keep the rain out, no questions asked. If you see drips or feel drafts when it’s windy and wet, that’s something the contractor needs to fix.
It’s always a good idea to have the installer walk you through the operation of each window before they leave. Ask them to show you how to open, close, and lock each one, and don’t be shy about asking them to demonstrate again if you’re not totally clear on it. They should also explain any special features your new windows might have.
Ensuring a Clean and Safe Environment
Once the new windows are in place, the job isn’t quite finished. It’s important to make sure the work area is left tidy and safe. This means the installation crew should pack up all their tools and materials, leaving no mess behind. Think of it like this: you hired them to improve your home, not to add to your cleaning chores.
Verify removal of all installation debris
This is a big one. You’ll want to check that all the old window parts, packaging from the new ones, bits of drywall, caulk tubes, and any other construction scraps are gone. Sometimes, small pieces can get kicked around or fall into unexpected places, so a good sweep and visual check are a must. Don’t let them leave until the site is clear of all trash and leftover materials.
Inspect surrounding areas for damage
While they’re working, installers can sometimes accidentally scuff walls, scratch floors, or even ding up nearby furniture. It’s a good idea to walk around the room and look closely at anything near the window installation. Check the walls, trim, flooring, and any furniture that was close by. If you spot any new marks or damage, point it out to the contractor before they depart so it can be addressed.
Confirm work areas are left clean
Beyond just removing debris, the installers should do a basic cleanup of the areas where they were working. This might include sweeping or vacuuming the floor, wiping down any surfaces that might have gotten dusty, and generally making the space look as good as it did before they started, minus the old windows, of course. It shows professionalism and respect for your home.
A clean worksite isn’t just about appearances; it’s a sign that the job was done with care. It means the team paid attention to the details, not just the main task of installing the window. This attention to detail often carries over into the quality of the installation itself.
Wrapping Things Up
So, you’ve gone through the whole process of getting new windows installed in Jacksonville. It might seem like a lot, but taking that time to check everything off your list after the work is done really pays off. Keeping all those papers, like warranties and inspection reports, is smart for the future, whether it’s for insurance or when you eventually sell your place.
Remember, good windows are a big deal for your home’s safety and comfort, especially with Florida’s weather. By making sure the job was done right, you’re not just getting new windows; you’re investing in peace of mind for years to come.
You’ve done the work to make sure everything checks out. Now, it’s about making sure your next project starts just as strong. Take a closer look at how Wallaby Windows handles window replacement in Jacksonville, FL with our project gallery, explore your options, or reach out when you’re ready to move forward.
Frequently Asked Questions
What are the most important things to check after my new windows are installed in Jacksonville?
After your new windows are put in, make sure they open and close smoothly. Check that the locks work right. Also, feel around the edges of the window frames for any drafts or gaps where air could get through. It’s also good to confirm that all the old stuff was cleaned up and the area looks tidy.
Do I need special windows for Jacksonville, Florida?
Yes, you do. Because Jacksonville can get strong winds and storms, Florida has building rules that require windows to be tough. You’ll need windows that are approved for our area, often called impact-resistant. They need to be able to handle wind and debris from storms. Always check for a Florida Product Approval or Miami-Dade NOA label.
What does ‘Design Pressure’ (DP) mean for my windows?
Design Pressure, or DP, tells you how much wind pressure a window can handle without breaking or leaking. A higher DP number means the window is stronger and can withstand more wind. For areas like Jacksonville, you’ll want to make sure your windows have a DP rating that meets or exceeds the requirements for our wind zone.
Who is responsible for getting permits for window replacement?
Your contractor is usually responsible for getting the necessary permits before starting the work. You should get proof that the permits were obtained and that the final inspection passed. This paperwork is important for your records and for future reference, like if you sell your home.
What kind of documents should I keep after the window replacement is done?
You should keep all the paperwork related to your window replacement. This includes the product specifications, any approval numbers (like Florida Product Approval or Miami-Dade NOA), the contractor’s license and insurance info, permits, final inspection reports, and the warranty details from the manufacturer. This helps if you ever have issues or need to prove the work was done correctly.
How do I know if my windows are installed correctly to protect against storms?
A good installation means the window frames are sealed tightly to the house, with no gaps for water or air to get in. The windows themselves should be properly secured. Asking your installer to show you how they sealed everything and checking for drafts yourself are good ways to be sure. Also, making sure the windows meet the Florida Product Approval standards is key for storm protection.