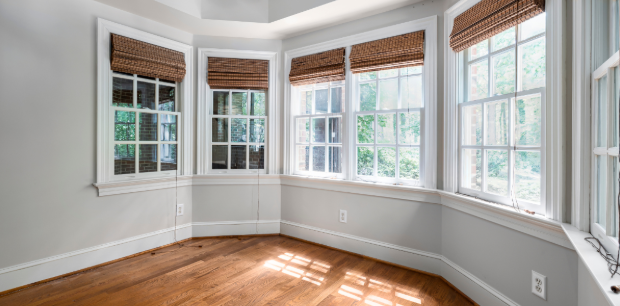
If you’ve been thinking about how to install a window, you’re in the right place. A fresh window installation can upgrade your home’s comfort, clarity, and curb appeal in a single afternoon.
The process feels a little technical at first, but once you understand the flow, it becomes a steady rhythm of prep, place, seal, admire. We’ll walk through everything you need from tools to trim so you can keep your project moving without guesswork.
If your goal is to install a new window that fits snugly, blocks drafts, avoids water infiltration, and works in an old house or a newer build, this guide gives you all the steps, tips, and checks that help your windows operate smoothly for the long run.
Get ready for an informative tour through the world of installing windows. Let’s jump in.
Key Takeaways
- Measure first, install second, and avoid the classic “oops, it doesn’t fit” moment.
- Sealing and flashing aren’t optional if you want dry walls and draft-free comfort.
- Not feeling the DIY life? Wallaby Windows is ready to make it easy and flawless.
Tools and Materials You’ll Want Handy
Gathering the right tools and materials at the start makes the entire installation process smoother. It also minimizes those “run back to the hardware store again” moments. Here’s what you’ll want close by.
Tools
- Tape measure for checking height and width
- Level for checking plumb and square
- Pry bar for removing the existing window frame
- Drill or driver for fasteners
- Utility knife for cutting caulk, house wrap tape, and flashing
- Hammer for small adjustments
- Angle grinder for stubborn fasteners on an old house
- Putty knife
- Safety glasses
- Small saw or multi-tool for trimming framing
- Computer or device if you need to pull up videos or instructions while you work
Materials
- Replacement windows
- Flashing tape
- House wrap tape
- House wrap
- Silicone or latex caulk
- Backer rod
- Low-expanding foam
- Sill pan
- Drip cap for the exterior
- Shims for adjusting position
- Sealant for final touches
- Fiberglass insulation for some openings
- Fasteners or screws for securing the window
Collecting everything at the start lets you complete the job without breaking your focus. Now let’s prep that opening.
Measure Twice, Order Once
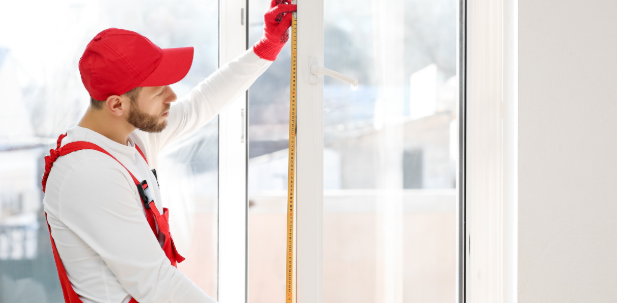
Before you remove anything, check that your replacement windows will fit your rough opening. A well-sized window frame saves time and keeps sealing issues away later.
Start by measuring the width of the opening at three spots: top, center, and bottom. Do the same for height.
Use the smallest number when ordering your new window. After that, check for square by measuring diagonally from corner to corner inside the opening. If the numbers differ by more than a few inches from each other, your opening may need repairs or minor adjustments.
If you are replacing an existing window frame, open the sashes and measure from inside the stop to the opposite side. This tells you how much space you’ve got to work with. Pull out a level to see if the sill dips toward the interior or the exterior. You can fix small issues with shims later.
Once everything checks out, you’re ready to clear the old window.
Out With the Old
Removing old windows is usually the messiest part of the project, especially on an old house that has layers of paint and caulk. Here’s how to clear the area safely:
- Score the edges of the trim and frame using your utility knife.
- Use your pry bar to pull off the interior trim without damaging the wall.
- Remove the sashes and any leftover hardware.
- Cut any old nails or stubborn fasteners with your angle grinder.
- Pull out the existing window frame.
Older homes often hide surprises like sash weights, broken springs, and pockets full of debris. Take your time and stay patient. This step gives you clear access to the opening so you can build a sturdy base for the new window.
Once removed, inspect for water damage or soft spots in the framing. If anything looks questionable, fix it now to avoid issues later.
Prep the Opening like a Pro
The installation process begins here. A clean, square, waterproof-ready opening sets up the whole window install for success.
Check the framing
Look at the sides, sill, and top for rot or problems. Replace damaged material with solid wood. Double-check that all areas are firm and level. If parts bow inward or outward, trim or shim until you get a clean base.
Install or repair the sill pan
A sill pan protects your house from rot by collecting and directing water out and away. Set it into place at the bottom of the opening and tape or glue according to the manufacturer’s instructions.
Apply flashing tape
Place flashing tape along the sill so water cannot slip behind the frame. Press it into the corners and smooth out wrinkles. Add tape to the sides, stopping short of the top for now. You’ll add the top piece once the window is in.
Use house wrap or house wrap tape around the opening to tighten the weather barrier. Your goal is to create a drainage plane that helps direct water outside. This small step pays off in a big way when it rains.
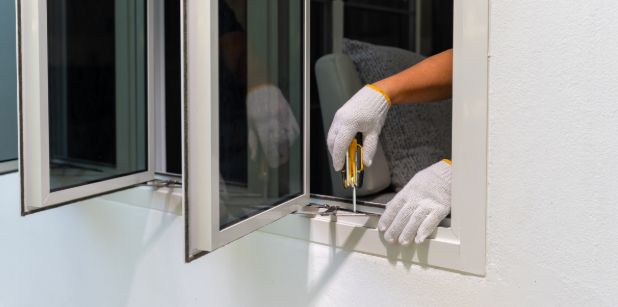
Dry Fit Then Go For It
Before applying caulk, do a dry fit. Lift the new window into place and check all sides. See if it sits snugly, not too loose and not too tight. Look for any uneven spots. The frame should sit flush with the interior wall and line up with the exterior surfaces, too.
Set the window aside and run a bead of caulk on the back of the nailing flange. Set beads along the sides, top, and bottom. This helps seal the window from air leaks.
Now lift the window back into the opening. Make sure you center it. Look at the gap on all sides to confirm even spacing. Use shims behind the window frame so everything is properly supported.
Check plumb, level, and square again. When you feel good about the alignment, you can move on to securing it.
Secure the Window
You’ll use the nailing fins on the outside of the frame to hold the unit in place. Start with the top corners. Add fasteners, but don’t overtighten. Work down each side, checking level and operation as you go.
Tips:
- Open and close the window after adding each set of fasteners to see if it continues to operate smoothly.
- If it sticks, squeaks, or rubs, back out the screw and add or remove a shim.
- Sometimes you’ll need minor adjustments, especially on a project that involves uneven framing.
When everything rests evenly and feels solid, you can clip or cut any shims that stick out past the trim line.
Seal It Tight
Sealing keeps out water, wind, and unwelcome insects. This step protects your home’s exterior and interior.
Flashing
Place more flashing tape over the nailing fins. Start at the bottom, then the sides, then the top. This creates a shingle-style barrier that keeps water from sneaking behind the window.
Foam and backer rod
Fill any remaining gap between the frame and the opening with low-expanding foam or fiberglass insulation. Foam should be applied lightly. Overfilling can warp the window. For wider spaces, insert backer rod first, then cover with caulk.
Caulk
Apply caulk around the exterior perimeter to finish the seal. Smooth each bead with your finger or a tool to keep it tidy. Add caulk inside around the trim later as well.
Your window is now protected and insulated.
Finish Strong With Trim and Curb Appeal
With everything sealed, you can add trim for a polished look.
Interior trim. Nail trim pieces around the inside to cover the gap between the drywall and the window frame. Add caulk where pieces meet the wall or window for a clean finish.
Exterior trim. Install exterior casing and attach a drip cap above the top. The drip cap helps direct water away from the opening, which prevents leaks in the long run.
Paint or stain all trim to match your house. Once this dries, your new window is complete.
Common Window Woes and Easy Fixes
If something feels off, here are quick checks you can do:
- Draft near the window: Check the inside bead of caulk. Fill gaps with backer rod and reseal.
- Water infiltration: Look at flashing. Check that each layer overlaps correctly.
- Window sticks: Recheck shims. A small twist or bow can throw off movement.
- Gap at sill: You may need additional shims under the frame to lift and stabilize.
If you ever feel stuck, search for more videos or tutorials online or consult an installation example for your window type.
When to Call in the Pros

DIY works well for many homeowners, but sometimes it helps to call a window expert. You might want help if:
- The window sits high on a wall or above a door
- You uncover serious water damage
- You can’t get the frame square
- You simply want to skip the mess and let someone else complete the job
If a window feels too heavy to lift or adjust, that is another good time to call for help.
Skip the Hassle and Let Wallaby Handle It
At Wallaby Windows, we know a great window installation is about more than just glass and frames—it’s about making your home more comfortable, efficient, and beautiful. While this guide shows you how to install a window yourself, we’re here if you’d rather leave it to the pros.
Our White Glove installation service takes care of every detail, from securing nailing fins to applying sealant for long-lasting performance. We use top-brand materials, offer insulating and noise-reducing options, and back our work with a “Pane-Free” Guarantee—including a 23-month post-install inspection.
Need more than windows? We also install sliding glass doors, entry doors, and French doors, so your entire exterior gets the upgrade it deserves.
Ready for a smooth, stress-free window or door project? Find your nearest Wallaby Windows location and schedule your free consultation today.
Conclusion
Now you know how to install a window with confidence. The steps from measuring to sealing are straightforward once you slow down, follow the process, and double-check alignment along the way. A well-installed window adds comfort, energy savings, and a fresh look to your home.
Keep this guide handy next time you want to install new windows, handle framing repairs, or upgrade a room with more natural light. And remember, if the project feels a bit bigger than you expected, Wallaby Windows is always here to help.
Frequently Asked Questions
What are the steps to install a window?
Installing a window is all about working in the right order. Here’s a quick breakdown:
- Measure the rough opening and double-check for square.
- Remove the old window and clear out the space.
- Inspect and prep the opening with flashing tape, house wrap, and a sill pan.
- Dry fit the new window and make any adjustments.
- Apply sealant to the nailing flange.
- Install and secure the window with fasteners and shims.
- Seal it up with flashing, foam, and caulk.
- Add trim and a drip cap for a finished, weatherproof look.
Simple, step-by-step, and totally doable with the right prep.
How many ways to install windows?
There are three main methods:
- Full-frame installation: Replace everything, including the frame. Best for damaged or outdated setups.
- Insert installation: Slide a new window into the existing frame. Faster and less invasive.
- New construction installation: Ideal for new builds. Uses a nailing flange for direct attachment to the framing.
Each method depends on the condition of your current windows and the scope of your project.
What is the first thing you must do before starting an installation?
Always start by measuring the rough opening. Check height, width, and diagonal dimensions to confirm fit and square. Skipping this step can lead to poor insulation, awkward gaps, or a window that just won’t fit. A good measurement sets you up for a smooth install from the start.