What to Expect When Replacing Your Windows: From First Consultation to Final Install

For homeowners in Coastal Jacksonville, Florida, replacing your windows is one of the most important steps you can take to protect your home, improve energy efficiency, and withstand harsh weather conditions. With salty air, hurricane threats, high humidity, and scorching summer temperatures, homes along the coast face unique challenges that demand specialized window solutions. Understanding what to expect from the consultation to the final install will help you make confident, informed decisions.

Step 1: Free In-Home Consultation by a Coastal Specialist

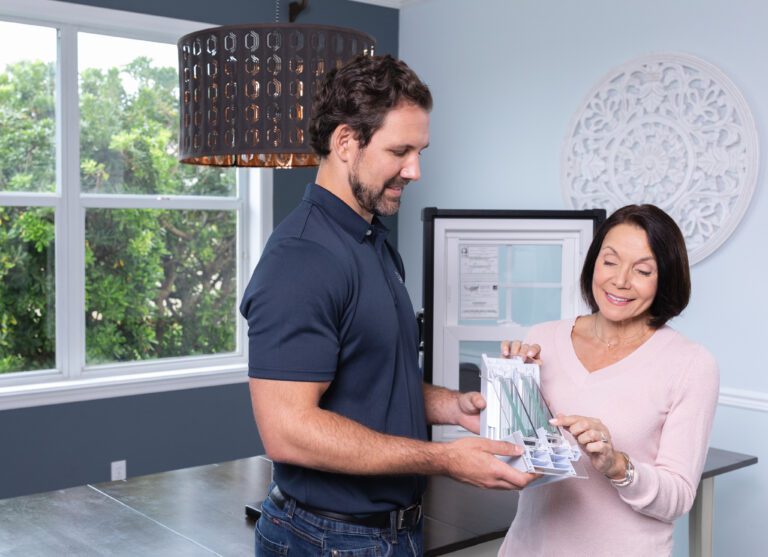
Your project begins with a free, no-obligation consultation at your coastal home. A Jacksonville-based window expert familiar with beachfront and Intracoastal conditions will assess your current windows, take accurate measurements, and talk through your goals. Whether your top concern is wind resistance, energy savings, or protecting against moisture intrusion, this consultation provides personalized recommendations suited for your location.

The visit typically lasts 60 to 90 minutes and results in a custom quote based on your specific property needs and design preferences.

Step 2: Window Selection and Detailed Estimate

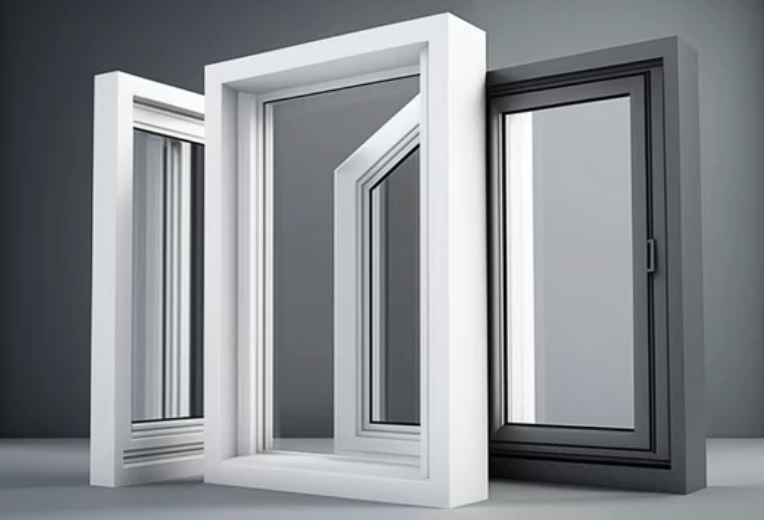
Following the consultation, you’ll receive a complete estimate outlining window types, storm ratings, frame materials, energy efficiency specifications, pricing, and expected timelines. Homeowners in coastal areas like Atlantic Beach or Ponte Vedra often opt for impact-rated windows with laminated glass, Low-E coatings, and argon gas insulation. These features help block UV rays, reduce cooling costs, and protect against flying debris during hurricane season.

For frame materials, vinyl and fiberglass are common choices thanks to their resistance to corrosion and minimal maintenance needs. Your contractor will walk you through each option, focusing on long-term performance in a salty, humid environment.

Step 3: Custom Manufacturing and Coastal Readiness

Once your choices are finalized and the contract signed, your windows will be custom-built to fit your home’s exact dimensions. Proper sizing is critical in coastal regions, where even small gaps can lead to water intrusion or air leaks. Depending on the scope of your order, manufacturing typically takes between two and six weeks.

While your windows are being fabricated, you can start preparing by removing curtains or blinds, clearing access to window openings, and disconnecting alarm sensors if needed.

Step 4: Coastal-Grade Installation in Jacksonville’s Beach Communities

When your new windows arrive, the installation crew will schedule the work at your convenience. Most installations in coastal Jacksonville are completed within one to three days depending on the number of windows and the complexity of the job.

The team will remove the old units, inspect the window frames for any water damage, and install the new windows using hurricane-rated fasteners, waterproof flashing, and marine-grade sealants. This step is essential to ensure your home can withstand coastal storms, strong winds, and high moisture levels.

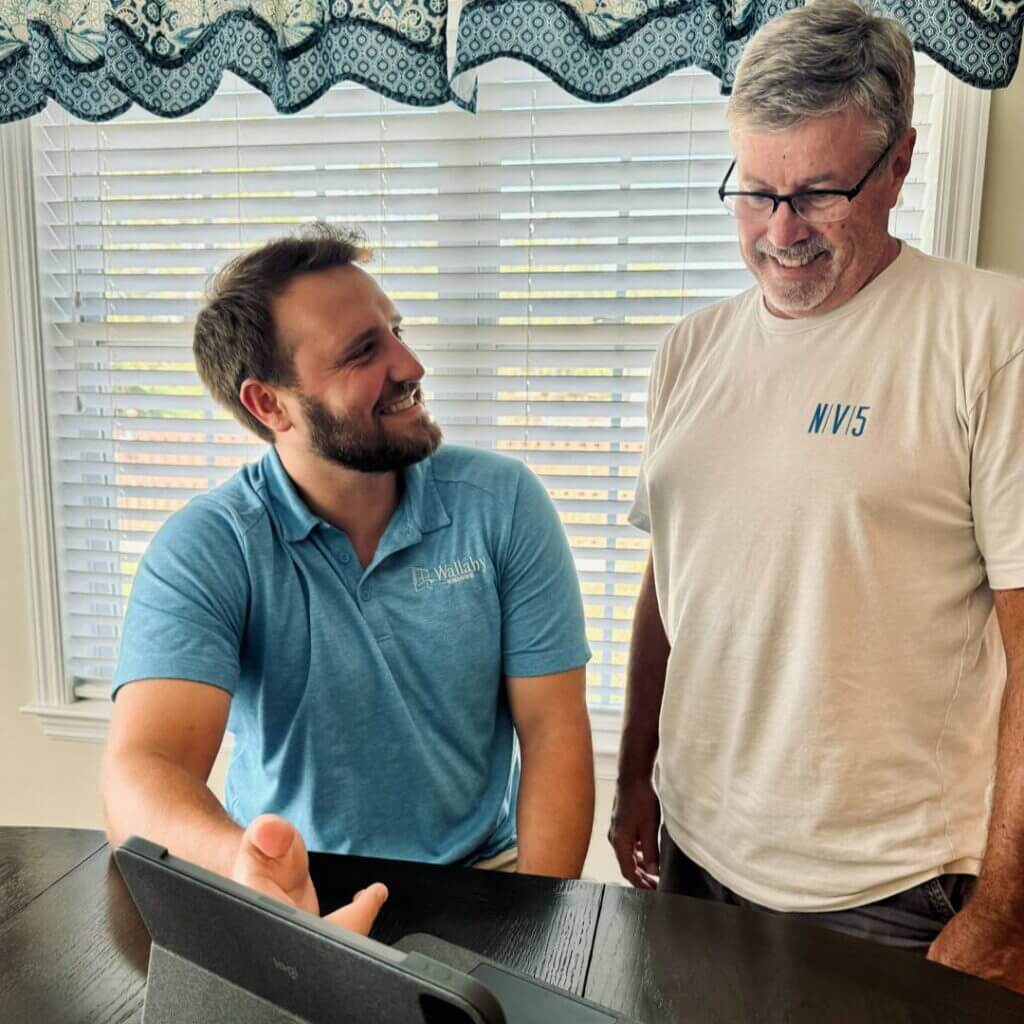
Step 5: Final Walkthrough and Site Cleanup

After installation, the crew will remove debris, clean the workspace, and guide you through a final inspection. You’ll learn how to operate and maintain your new windows, receive warranty documentation, and get tips on keeping your windows performing well in a salt-air environment.

This final step guarantees that you are satisfied with the installation and that everything is functioning as intended.

Why Coastal Jacksonville Homeowners Rely on Local Experts

Choosing a contractor who specializes in coastal installations is critical. Homes near the water face different risks than inland properties. From salt corrosion to windborne debris, your installer must understand the coastal code requirements and the materials that hold up best in these conditions.

Local Jacksonville professionals also provide faster response times, understand neighborhood architectural styles, and are more committed to long-term service and support.

Book Your Free Estimate Today

Don’t wait—schedule your free consultation and take the first step toward upgrading your home with Wallaby’s trusted services.

Let's get some information!

<div id="est-phone-number"></div>
<style>
  .estimate-form-inner-wrapper {
    display: flex;
    flex-direction: column;
    gap: 16px;
    margin-bottom: 0px !important;
  }

  .estimate-form-input-grid {
    display: grid;
    align-items: initial;
    grid-template-columns: 1fr 1fr;
    grid-gap: 16px;
  }

  .estimate-form-input-wrapper {
    display: flex;
    flex-direction: column;
    justify-content: flex-end;
  }

  .estimate-form-input-wrapper p {
    font-family: Inter;
    font-size: 14px;
    font-weight: 500;
    line-height: 21px;
    color: black;
    margin-bottom: 4px;
  }
  .estimate-form-input-wrapper span {
    color: red;
  }

  .estimate-form-input-wrapper input {
    padding: 8px 16px;
    border-radius: 4px;
    border: 0.5px solid rgba(163, 163, 163, 0.5);
    color: black;
    font-family: Inter;
    font-size: 16px;
    font-weight: 500;
    line-height: 24px;
  }

  .estimate-form-input-wrapper input::placeholder {
    color: #a3a3a3;
    font-family: Inter;
    font-size: 16px;
    font-weight: 500;
    line-height: 24px;
  }

  .estimate-submit-btn {
    padding: 12px 28px !important;
    border-radius: 999px !important;
    background-color: #043968 !important;
    background-color: var(--bricks-color-fvnfur)!important;
    font-size: 16px !important;
    font-weight: 700 !important;
    line-height: 24px !important;
    color: #ffffff !important;
    text-transform: uppercase !important;
    align-self: flex-start !important;
    transition: all 0.3s ease !important;
    cursor: pointer !important;
  }

  .estimate-submit-btn:hover {
    background-color: var(--bricks-color-ykxnnf) !important;
    color: white !important;
  }

  .wpcf7-form input[type="submit"].custom-estimate-submit-btn {
    padding: 12px 16px !important;
    border-radius: 8px !important;
    background-color: #043968 !important;
    font-family: "Filson pro" !important;
    font-size: 16px !important;
    font-weight: 700 !important;
    line-height: 24px !important;
    color: #95c93d !important;
    text-transform: uppercase !important;
    align-self: flex-start !important;
    transition: all 0.3s ease !important;
    cursor: pointer !important;
  }

  .wpcf7-form input[type="submit"].custom-estimate-submit-btn:hover {
    background-color: #7eb4a3 !important;
    color: white !important;
  }

  @media only screen and (max-width: 990px) {
    .estimate-form-wrapper {
      grid-template-columns: 1fr;
      grid-gap: 64px;
    }
  }

  @media only screen and (max-width: 477px) {
    .estimate-form-input-grid {
      grid-template-columns: 1fr;
    }
  }
</style>

<form method="post" class="estimate-form-inner-wrapper" id="seviceminder-form">
  <div class="estimate-form-input-grid">
    <div class="estimate-form-input-wrapper">
      <p>Name <span>*</span></p>
      <input
        type="text"
        id="name"
        name="Name"
        required
        placeholder="First Name"
      />
    </div>
    <div class="estimate-form-input-wrapper">
      <input type="text" name="lName" id="lName" placeholder="Last Name" />
    </div>
  </div>
  <div class="estimate-form-input-grid">
    <div class="estimate-form-input-wrapper">
      <p>Email <span>*</span></p>
      <input
        type="email"
        id="email"
    		name="Email"
        required
        placeholder="Enter Email"
      />
    </div>
    <div class="estimate-form-input-wrapper">
      <p>Phone Number <span>*</span></p>
      <input type="tel" id="phone" name="Phone1" maxLength=14 placeholder="Enter phone number" required/>
    </div>
  </div>
  <div class="estimate-form-input-grid">
    <div class="estimate-form-input-wrapper">
      <p>Address line 1</p>
      <input type="text" id="address1"
    name="Address1" />
    </div>
		<div class="estimate-form-input-wrapper">
      <p>Address line 2</p>
      <input type="text" id="address2"
    name="Address2" />
    </div>    
  </div>
  <div class="estimate-form-input-grid">
    <div class="estimate-form-input-wrapper">
      <p>City</p>
      <input type="text" aria-required="true"
        aria-invalid="false"
        id="city"
        name="City" />
    </div>
    <div class="estimate-form-input-wrapper">
      <p>State</p>
      <input type="text" aria-required="true"
      aria-invalid="false"
      id="state"
      name="State" />
    </div>
  </div>
  <div class="estimate-form-input-grid">
    <div class="estimate-form-input-wrapper">
      <p>Zip Code <span>*</span></p>
      <input type="text" id="postalcode"
      name="PostalCode" required />
    </div>
    <div class="estimate-form-input-wrapper">
    <input type="hidden" name="key" id="serviceminder-key" />
  </div>
  </div>
  <input
      type="hidden"
      id="RedirectUrlPopup"
      name="RedirectUrl"
    />
  <button type="submit" class="estimate-submit-btn" id="serviceminder-submit">
    Submit
  </button>
</form>